7 Helpful Steps If You Are New to Screen Printing
 Screen printing for fun, as a hobby or as a business is gaining in popularity. Screen printing is used to print logos, graphics or messages on all types of clothing especially T-shirts and caps. Screen printed clothing is everywhere. Some examples are T-shirts worn by employees, club members, students, sports teams, baseball caps, graphic tees and more. Screen printing on clothing is an excellent way to advertise business, school, charity, sporting events or to spread your message.
If you are thinking about customizing a T-shirt, you can make your own design and follow these simple steps. First you will need to make a list of screen printing supplies and equipment:
- T-Shirt
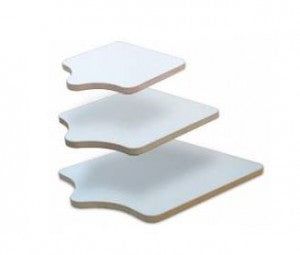
- Flat wooden board the size of the T-shirt with smooth edges (or a screen printing board)
- Ink for screen printing
- Silk Screen Frame
- Iron for pressing design
- Wiper/Squeegee
- Hanger
- Paper
If this is your first experience, you can ask the screen printing supply store for information on the process or check on line at www.mclogan.com. After you have assembled the materials, you are ready to begin.
 The first step of screen printing is to insert the wooden board inside the T-Shirt. The board must be appropriate to the size of the T-shirt or a little bigger insuring a smooth fit with no wrinkles. The surface has to be smooth so the ink can be applied evenly.
Next follow these 7 steps:
- Carefully place the shirt inside the silk screen frame and get ready to apply the ink.
- Turn the ink bottle upside down and using a back and forth motion, go from corner to corner squeezing out a few thin beads.
- Take the wiper and beginning at the top of the screen, run the wiper down to the bottom and then back to the top. The wiper is simply a wooden handle with a rubber blade attached to it allowing you to spread the ink evenly throughout the frame. Through the design in the emulsion, the ink is transferred onto the shirt.
- Remove the T-Shirt from the screen, and take out the wooden board.
- Place the shirt on a hanger to dry.
- Once the T-shirt has dried, take it off the hanger and lay it on a flat surface. Place a clean piece of paper over the design and iron the area for about 5 minutes to permanently set the ink.
- If you want to print a design on the back of the T-shirt, just repeat the process.
 When you are finished, make sure you throughly clean your equipment so you can be ready for your next screen printing project. These few tips can be helpful:
- If cost is a factor, use black ink or white- it is usually cheaper
- You can use any color combination, but to set off the design
- Use shades of dark inks for light colored T-shirts
- Use shades of light inks for dark colored shirts
- Use metallic foils for dramatic and elegant effects
You can create your own customized T-shirt using this screen printing method by following these simple steps. Order McLogan screen printing supplies on line at our website or stop in one of our four stores for help with your first projects. We're glad to get you started.

Leave a comment